
Detecting AC problems means inspecting your system’s key components, reading its symptoms, and knowing which warning signs require immediate action. Most homeowners wait until the air stops blowing cold entirely, but the real cost savings come from catching issues early. Approximately 90% of common AC failures trace back to maintenance issues like thermostat settings, clogged air filters, or tripped breakers. That means most problems are identifiable before they become expensive. This guide walks you through every major checkpoint, from your Honeywell or Ecobee thermostat to the outdoor condenser unit, so you can troubleshoot with confidence and communicate clearly with your HVAC technician when the time comes.
How to detect AC problems starting with your thermostat
The thermostat is the most overlooked source of AC failure, and it is also the easiest to fix. Before assuming your system is broken, spend two minutes confirming the basics.
- Mode setting: Confirm the thermostat is set to COOL, not FAN ONLY or HEAT. This sounds obvious, but accidental mode changes are one of the most common service call triggers.
- Temperature setting: The set temperature must be lower than the current room temperature. If your room reads 78°F and the thermostat is set to 78°F, the system has no reason to run.
- Display brightness: A dim or fading display on a battery-powered thermostat signals low batteries. Replace them with fresh AA or AAA batteries before drawing any other conclusions.
- Smart thermostat quirks: Devices like the Nest Learning Thermostat or Ecobee SmartThermostat can enter “away” or “eco” modes automatically, raising the target temperature without your input. Check the app or display for any active schedules or modes.
- Wiring check: If the display is completely blank and fresh batteries don’t help, the thermostat may have lost its 24V power connection. This requires a technician.
Pro Tip: Set your thermostat to COOL, drop the target temperature 5°F below the current room reading, and wait 10 minutes. If the system doesn’t respond at all, the problem is likely electrical rather than a thermostat setting.
A thermostat issue that mimics full AC failure is surprisingly common. Ruling it out first saves you a service call fee and gives you a clear starting point for deeper checks.

What to check with air filters, vents, and airflow
Restricted airflow is the second most common cause of poor AC performance, and it is entirely preventable. A clogged 1-inch pleated filter from brands like Filtrete or Nordic Pure can reduce airflow enough to freeze the evaporator coil, which then shuts down cooling entirely.
Follow these steps to inspect your airflow system:
- Locate your air filter. It sits either in the return air grille on the wall or ceiling, or inside the air handler cabinet itself. Most Southwest Florida homes use 1-inch or 4-inch filters.
- Pull the filter and hold it up to light. If you cannot see light through it, replace it immediately. A gray, matted filter is choking your system.
- Check every supply vent in the home. Walk room to room and confirm that all registers are open and unobstructed by furniture, rugs, or curtains. Closed vents force pressure back into the duct system and stress the blower motor.
- Inspect return air grilles. These are the larger grilles that pull air back to the air handler. Dust buildup here reduces the volume of air the system can process.
- Perform a delta-T check. A delta-T check between return and supply air measures the temperature difference between the air going into the system and the air coming out. A normal reading is 15 to 20°F. A reading below 15°F suggests low refrigerant or restricted airflow.
Symptoms of an airflow problem include weak output from vents, uneven cooling between rooms, and ice forming on the copper refrigerant lines near the air handler. Ice on the lines is a red flag. Turn the system off and let it thaw for two hours before restarting. If ice returns within a day, the cause is either a dirty filter or low refrigerant.
Pro Tip: Replace your air filter every 30 days in Southwest Florida. The combination of high humidity, dust, and near-constant system runtime clogs filters far faster than the 90-day recommendation on the packaging.
How to check circuit breakers, disconnects, and the outdoor unit
50 to 60% of all AC failures originate in the outdoor unit, making the electrical supply and condenser the next logical checkpoint. This inspection requires no tools and takes about five minutes.
- Main electrical panel: Locate your home’s breaker box and find the breaker labeled for the air conditioner or HVAC. It is typically a double-pole breaker rated at 30 to 60 amps. If it is in the tripped position (center or opposite from ON), switch it fully OFF and then firmly back to ON.
- Outdoor disconnect box: Most outdoor condenser units have a gray metal disconnect box mounted on the exterior wall nearby. Open it and confirm the disconnect block or fuses are fully seated. A loose disconnect is a common cause of a non-running outdoor unit.
- Condenser unit clearance: Walk to the outdoor unit and check that no debris, overgrown shrubs, or fencing is within 18 inches on all sides. Restricted airflow around the condenser forces the compressor to work harder and overheat.
- Fan operation: Look through the top grille of the condenser. When the system is running, the fan blade should be spinning. A fan that hums but does not spin points to a failed capacitor.
- Buzzing or clicking sounds: A buzzing sound from the outdoor unit with no fan movement is a classic sign of a failing capacitor or contactor. A clicking sound that repeats every few seconds without the system starting is called short cycling and needs professional diagnosis.
Safety warning: Capacitors hold lethal electrical charges even when the system is powered off. Never open the condenser cabinet or attempt to replace a capacitor yourself. This is a job for a licensed HVAC technician only.
If the breaker trips again within 24 hours of resetting, stop resetting it. A repeatedly tripping breaker signals a short circuit, a failing compressor, or a ground fault. Each reset without diagnosis risks permanent compressor damage.
How to detect AC leaks and refrigerant loss symptoms
Refrigerant leaks are one of the harder AC problems to catch because low refrigerant symptoms appear gradually and are often mistaken for normal wear. Knowing what to look and listen for changes that.
| Detection method | Who can do it | What it reveals |
|---|---|---|
| Visual inspection of lines | Homeowner | Oil stains or frost on copper lines near the air handler |
| Soap bubble test on fittings | Homeowner | Bubbles forming at valve connections indicate a leak |
| Electronic leak detector | HVAC technician | Pinpoints leaks as small as 0.03 ounces per year |
| UV dye and black light | HVAC technician | Traces refrigerant path to locate hidden leaks |
| Nitrogen pressure test | HVAC technician | Confirms leak location and system integrity before recharge |
The symptoms you can identify yourself include warm air blowing from vents despite the system running, ice forming on the copper refrigerant lines or the indoor coil, a hissing or bubbling sound near the air handler or outdoor unit, and energy bills rising without a change in usage. For a deeper look at these signs, the refrigerant leak signs guide from Ultraairswfl covers Southwest Florida conditions specifically.
For a basic DIY check, inspect the service valve caps on the outdoor unit. Service valve caps are the main source of nuisance refrigerant leaks, and homeowners can check that they are hand-tight and that the rubber O-rings inside are intact and not cracked.
Pro Tip: Never let a technician simply “top off” your refrigerant without finding the source of the loss. A refrigerant leak always requires repair, not just a recharge. Topping off without fixing the leak means the refrigerant will escape again, and you will pay for the recharge twice.
One important note for older systems: if your unit uses R-22 refrigerant (common in systems installed before 2010), repair costs for R-22 systems are often uneconomical. A refrigerant leak in an older R-22 system is frequently the tipping point that makes replacement the smarter financial choice.
When to call a professional instead of troubleshooting further
Some AC symptoms are not troubleshooting opportunities. They are stop signs. Systems producing burning smells, smoke, or grinding noises need immediate shutdown and professional inspection.
- Burning smell from vents: Indicates overheating electrical components or a failing blower motor. Turn the system off at the thermostat and the breaker.
- Smoke from the unit: Shut down immediately and call a technician. Do not restart the system.
- Grinding or screeching sounds: Metal-on-metal contact inside the blower or compressor. Running the system further causes irreversible damage.
- No response after all basic checks: If the thermostat, breakers, filter, and outdoor unit all check out but the system still does not cool, the fault is internal and requires diagnostic equipment.
- Repeated breaker trips: As noted above, this is a sign of a serious electrical fault, not a nuisance reset situation.
Before your technician arrives, log your symptoms with timing details. Write down when the problem started, how often the system cycles on and off, what sounds you hear, and what the indoor temperature reads versus the thermostat setting. This information cuts diagnostic time significantly and helps the technician arrive with the right parts.
Calling early also protects your wallet. A failing capacitor costs $150 to $300 to replace. A compressor that burns out because the capacitor was ignored costs $1,200 to $2,500 or more. The warning signs of HVAC problems that homeowners miss most often are the ones that lead to the largest repair bills.
Key takeaways
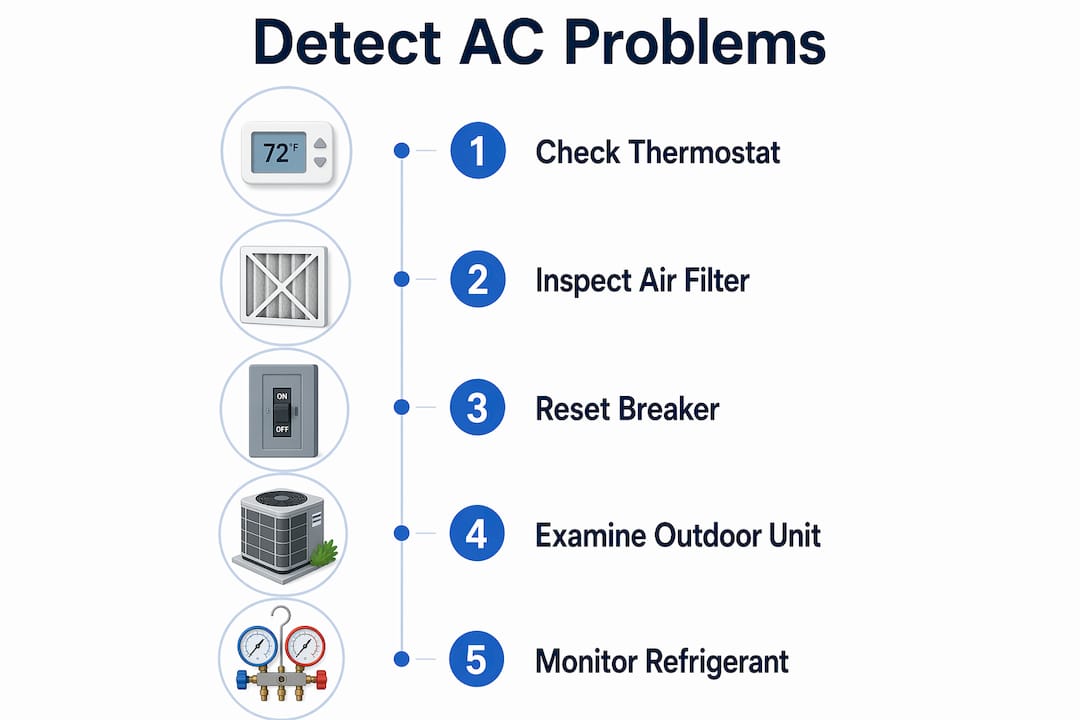
Catching AC problems early requires checking the thermostat, air filter, circuit breakers, outdoor unit, and refrigerant lines in that order before calling a technician.
| Point | Details |
|---|---|
| Start with the thermostat | Confirm COOL mode, correct temperature setting, and fresh batteries before any other check. |
| Replace filters monthly in Florida | A clogged filter causes ice buildup, weak airflow, and compressor strain within weeks. |
| Outdoor unit failures are most common | 50 to 60% of AC failures originate in the condenser; check fan operation and clearance first. |
| Refrigerant leaks need repair, not recharging | Topping off refrigerant without fixing the leak is a temporary fix that costs you twice. |
| Log symptoms before calling a technician | Timing, sounds, and temperature readings help technicians diagnose faster and arrive prepared. |
What I’ve learned after years of watching homeowners troubleshoot AC
Most homeowners I talk to make the same mistake: they skip straight to calling for a refrigerant recharge when the air feels warm. In Southwest Florida, where systems run nearly year-round, that instinct is understandable. But nine times out of ten, the first call should be to the thermostat, not the technician.
The other pattern I see constantly is homeowners who notice a problem, ignore it for two weeks, and then call when the system has completely stopped. That two-week window is almost always when a $200 fix becomes a $1,500 fix. A buzzing outdoor unit that runs for two weeks with a failing capacitor will eventually take the compressor with it.
What actually works is a simple monthly habit: replace the filter, walk to the outdoor unit and confirm the fan is spinning, and glance at the copper lines near the air handler for any frost. That three-minute check catches the majority of developing problems before they compound.
I also want to be direct about electrical work. Capacitors, contactors, and anything inside the condenser cabinet are not DIY territory. The charge stored in a capacitor can kill you even with the power off. The DIY AC maintenance checklist from Ultraairswfl draws a clear line between what homeowners can safely handle and what requires a licensed technician. That line exists for good reason.
The homeowners who spend the least on AC repairs over time are the ones who do the basic checks themselves and call a professional at the first sign of something they cannot explain. That combination of informed DIY and timely professional involvement is the most cost-effective approach available.
— albert
Get professional AC diagnostics from Ultraairswfl

When your own checks point to something beyond a filter or thermostat setting, Ultraairswfl brings the diagnostic tools and licensed technicians to find the exact fault fast. The team serves Naples, Cape Coral, and Fort Myers with advanced leak detection equipment, electrical diagnostics, and full system inspections that go far beyond what any visual check can reveal. If your system is aging or repair costs are climbing, explore quality AC installation options or check out HVAC financing options to make an upgrade affordable. Catching problems early with professional support is always cheaper than waiting for a full breakdown in the middle of a Florida summer.
FAQ
What are the most common signs of AC problems?
The most common signs include warm air from vents, weak airflow, ice on refrigerant lines, unusual sounds like buzzing or grinding, and rising energy bills without increased usage. Most of these symptoms point to a thermostat issue, clogged filter, or refrigerant loss.
How do I check if my AC is leaking refrigerant?
Look for frost on the copper lines near the air handler, listen for a hissing or bubbling sound near the outdoor unit, and check whether the air coming from your vents is noticeably warmer than usual. A soap bubble test on service valve fittings can confirm a surface-level leak, but electronic detection by a technician is needed for hidden leaks.
Why does my AC keep tripping the circuit breaker?
A breaker that trips repeatedly signals an electrical fault such as a short circuit, a failing compressor, or a ground fault in the wiring. Reset it once and monitor the system. If it trips again within 24 hours, call a licensed technician and do not reset it again.
Can I recharge my own AC refrigerant?
No. Handling refrigerants requires EPA Section 608 certification, and adding refrigerant without repairing the leak first is ineffective. The refrigerant will escape again, and you will pay for the recharge twice without solving the underlying problem.
How often should I check my AC system for problems?
Replace the air filter monthly, inspect the outdoor unit for debris and fan operation monthly, and schedule a professional tune-up once a year. In Southwest Florida’s climate, where systems run nearly year-round, annual professional maintenance is the minimum standard.