
HVAC diagnostic tests are specialized procedures used to evaluate the performance and safety of heating and cooling systems, uncovering problems that visual inspections alone cannot detect. Knowing the types of HVAC diagnostic tests available helps you ask the right questions, understand your technician’s findings, and make better decisions about repairs. Standard diagnostic procedures cover four core categories: electrical testing, refrigerant evaluation, airflow assessment, and safety checks. Each category uses specific tools and measurement standards, including ASHRAE guidelines and instruments like combustion analyzers and manometers, to produce readings that reveal exactly what is wrong and why.
What are the main types of HVAC diagnostic tests?
HVAC diagnostic procedures fall into five broad categories. Each targets a different system function, and a thorough inspection typically covers all of them. Standard diagnostic visits last 60–90 minutes and cost between $100 and $300 depending on the tools required. That range reflects real differences in complexity, not just labor time.
The five core test types are:
- Visual inspection. Technicians check for obvious damage, corrosion, loose connections, and blocked vents. Visual checks are the starting point, not the finish line. They miss refrigerant leaks, electrical faults, and airflow restrictions hiding inside ducts or coils.
- Electrical testing. Voltage, continuity, and amperage measurements identify failing motors, weak capacitors, and faulty contactors. A multimeter is the primary tool. 90% of service calls use a core kit of a multimeter, digital manifold gauge, and thermometer.
- Refrigerant health evaluation. Pressure and temperature readings from digital manifold gauges reveal whether the system is properly charged. This test catches leaks and charge imbalances that reduce cooling capacity and raise energy bills.
- Airflow assessment. Static pressure tests and airflow volume measurements identify restrictions in ducts, filters, and coils. This category is often the most revealing for systems that cool unevenly or run constantly.
- Safety diagnostics. Combustion analysis and carbon monoxide testing protect occupants from invisible hazards in gas furnaces and heat exchangers. These tests go well beyond what any visual check can confirm.
Understanding which test addresses which symptom saves you from paying for repairs that do not fix the actual problem.
How airflow and static pressure testing diagnose duct and blower issues
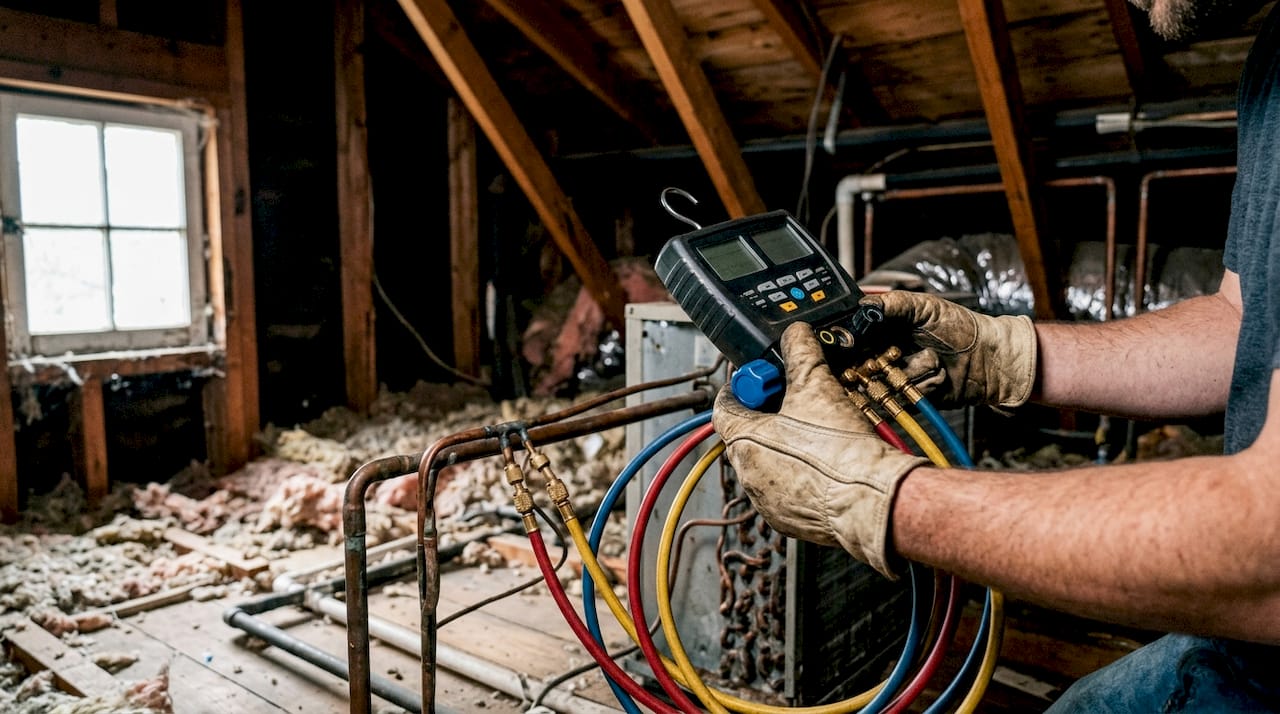
Total External Static Pressure, known as TESP, measures the resistance your blower motor fights to push air through the duct system. Think of it like blood pressure for your HVAC system. A healthy supply static pressure reads between 0.2 and 0.5 inches of water gauge (inWG). High static pressure above 0.5 inWG signals restrictions from dirty filters, undersized ducts, or fouled coils.
Technicians use manometers to capture these readings. They insert probes at specific points in the supply and return duct system to map where pressure drops occur. The location of the drop tells the technician exactly which component is causing the restriction. This method is non-destructive and produces results in minutes.
Duct leakage testing goes one step further. A duct blaster pressurizes the duct system to 25 Pascals, the pressure standard used in most energy codes, and measures how much air escapes in cubic feet per minute (CFM25). Static pressure budgets function as health records for your duct system, showing whether performance matches the original design intent.
The direction of pressure during duct leakage testing matters. Positive pressure testing works best for supply ducts because it pushes air outward through leaks, making them easier to locate. Negative pressure testing suits return ducts because it simulates the actual suction conditions those ducts experience during operation.
| Test type | Best for | Pressure direction |
|---|---|---|
| Positive pressure duct leakage | Supply duct leak detection | Pressurized outward |
| Negative pressure duct leakage | Return duct leak detection | Depressurized inward |
| TESP measurement | Overall airflow restriction | Both supply and return probes |
Pro Tip: Ask your technician to share the raw TESP reading before and after any filter or coil cleaning. A drop in static pressure after cleaning confirms the restriction was the root cause, not a guess.
Understanding why airflow matters in your system helps you interpret these readings and prioritize repairs correctly.
What refrigerant diagnostic tests reveal about system efficiency
Refrigerant diagnostics are the most misunderstood part of HVAC system performance evaluation. Homeowners often assume low cooling means low refrigerant. Pressure-based diagnostics differentiate between refrigerant charge issues, coil dirt, and airflow restriction far more effectively than assumptions do.
Technicians connect digital manifold gauges to the suction and discharge ports of the system. These gauges read both pressure and temperature simultaneously. The readings feed into two key calculations:
- Superheat. This measures how much warmer the refrigerant vapor is compared to its boiling point at the suction line. High superheat indicates undercharge. Low superheat points to overcharge or a metering device problem.
- Subcooling. This measures how much cooler the liquid refrigerant is compared to its condensing point at the liquid line. Low subcooling confirms undercharge. High subcooling suggests overcharge or a restriction in the liquid line.
Superheat and subcooling values map directly to specific root causes, which is why technicians rely on them rather than guessing. Adding refrigerant to an overcharged system makes performance worse, not better. These calculations prevent that mistake.
Leak detection follows pressure testing when readings suggest a charge problem. Technicians use electronic leak detectors or UV dye to find the exact leak point. Fixing a leak without verifying the charge afterward leaves the system in an unknown state. A complete refrigerant diagnostic always ends with a verified superheat and subcooling reading after any charge adjustment.
What electrical and safety diagnostic tests protect your home
Electrical testing covers three measurements: voltage, continuity, and amperage. Voltage checks confirm the system receives the correct power supply. Continuity tests verify that circuits are complete and no wires are broken. Amperage measurements show whether motors and compressors draw within their rated range. A motor pulling too many amps is working too hard and will fail early.
Electrical tests including voltage, continuity, and amperage diagnose motor, capacitor, and control problems that cause intermittent failures or complete shutdowns. Capacitors are a common failure point in Florida’s heat. A weak capacitor shows normal voltage but reduced microfarad output, a reading only an electrical test can confirm.
Safety diagnostics for gas furnaces require combustion analysis. A combustion analyzer measures:
- Carbon monoxide (CO) concentration in flue gases
- Oxygen percentage in the combustion chamber
- Stack temperature at the heat exchanger outlet
- Combustion efficiency as a calculated percentage
Combustion analysis detects cracked heat exchangers and unsafe CO levels that no visual inspection can find. A cracked heat exchanger leaks combustion gases directly into your living space. CO is odorless and colorless, which makes this test genuinely life-critical, not just a maintenance checkbox.
Pro Tip: Request a printed or emailed copy of your combustion analysis results. CO readings, oxygen percentage, and stack temperature should all be documented. If a technician cannot provide these numbers, the test was not performed properly.
Distinguishing diagnostic testing from routine HVAC maintenance matters here. Maintenance cleans and lubricates. Diagnostics measure and verify. Both are necessary, but they answer different questions.
Which tools HVAC professionals use during diagnostic inspections
Professional HVAC diagnostics require specific instruments. Each tool targets a different system variable, and no single device covers everything. The core toolkit includes:
- Digital manifold gauge sets ($200–$450): Measure refrigerant pressure and temperature simultaneously. Modern wireless versions transmit readings to a tablet for real-time analysis.
- Manometers ($100–$300): Measure static pressure in ducts. Essential for airflow diagnostics and duct leakage testing.
- Combustion analyzers ($400–$1,500): Measure CO, oxygen, and stack temperature in gas appliances. Required by law in many states for gas furnace diagnostics.
- Multimeters ($30–$150): Measure voltage, continuity, and resistance across electrical components.
- Infrared thermometers and thermal cameras: Detect temperature differences across surfaces, revealing hot spots in electrical panels or cold spots in duct insulation.
- Data loggers: Record system performance over time, capturing intermittent faults that do not appear during a single visit.
Diagnostic tool costs range from $30 for a basic multimeter to $1,500 for a professional combustion analyzer. A complete professional kit represents a significant investment, which is one reason diagnostic visits cost more than basic maintenance calls. Monitoring HVAC health over time with data logging tools gives property managers a performance record they can use to plan repairs before failures happen.
Key Takeaways
Comprehensive HVAC diagnostic testing requires airflow, refrigerant, electrical, and safety measurements because visual inspection alone cannot identify the root cause of most system failures.
| Point | Details |
|---|---|
| Visual inspection has limits | It identifies obvious damage but misses refrigerant leaks, electrical faults, and duct restrictions. |
| Static pressure reveals airflow health | TESP above 0.5 inWG signals restrictions from dirty filters, undersized ducts, or fouled coils. |
| Superheat and subcooling prevent misdiagnosis | These calculations confirm whether refrigerant charge is the actual problem before adding refrigerant. |
| Combustion analysis is a safety test | It detects cracked heat exchangers and CO levels invisible to the naked eye. |
| Ask for documented readings | Written results from every test give you a performance baseline for future comparisons. |
Why I think most homeowners underestimate HVAC diagnostics
After years of working in and around HVAC systems in Southwest Florida, the pattern I see most often is this: homeowners call for a repair, get a part replaced, and then call again three months later with the same symptom. The part was not the problem. The underlying cause was never measured.
The biggest misconception I encounter is that refrigerant is always the culprit when a system stops cooling well. Pressure readings almost always tell a different story. Dirty coils, restricted ducts, or a failing blower motor produce identical symptoms to low refrigerant. Without actual measurements, a technician is guessing.
The second issue is treating diagnostics as optional. Diagnostics are not a premium add-on. They are the only way to know what is actually wrong. A system that “seems fine” during a visual check can have static pressure double the acceptable limit, a capacitor at 60% of its rated output, or CO levels building in a cracked heat exchanger.
My advice is direct: always ask for the numbers. Voltage readings, static pressure results, superheat and subcooling values, combustion analysis output. If your technician cannot hand you a written record of those measurements, you did not get a diagnostic. You got a guess.
— albert
Ultraairswfl brings professional diagnostics to Southwest Florida homes
Ultraairswfl serves homeowners and property managers across Naples, Cape Coral, and Fort Myers with full diagnostic inspections using professional-grade tools, including digital manifold gauges, manometers, combustion analyzers, and data loggers.
Every inspection produces documented readings across all four diagnostic categories: airflow, refrigerant, electrical, and safety. Property managers overseeing multiple units benefit from the performance records these inspections generate, making it easier to plan maintenance budgets and avoid emergency repairs. Homeowners get a clear picture of system health, not a list of parts to replace. If you want to understand exactly how your system is performing, Ultraairswfl’s HVAC diagnostic services give you the measurements that make that possible. You can also learn how diagnostics connect to indoor air quality outcomes for your household.
FAQ
What does an HVAC diagnostic test include?
A standard HVAC diagnostic test includes visual inspection, electrical testing, refrigerant pressure and temperature measurements, airflow and static pressure assessment, and safety checks such as combustion analysis. Most diagnostic visits last 60–90 minutes and cost between $100 and $300.
How often should homeowners schedule HVAC diagnostic testing?
Homeowners should schedule a full diagnostic inspection at least once per year, ideally before peak cooling or heating season. Property managers with multiple units benefit from semi-annual testing to catch developing issues before they cause tenant complaints or equipment failures.
What is static pressure testing and why does it matter?
Static pressure testing measures the resistance your blower motor works against to push air through your duct system. High static pressure above 0.5 inWG signals restrictions from dirty filters, undersized ducts, or fouled coils that reduce efficiency and accelerate equipment wear.
Can a technician tell if refrigerant is low without a diagnostic test?
No. Low refrigerant produces the same symptoms as dirty coils, restricted airflow, and blower problems. Superheat and subcooling calculations from pressure and temperature readings are the only reliable way to confirm a refrigerant charge issue before adding or removing refrigerant.
What is combustion analysis and who needs it?
Combustion analysis measures CO concentration, oxygen percentage, and stack temperature in gas furnaces to detect cracked heat exchangers and unsafe combustion conditions. Any home or property with a gas furnace needs this test annually because CO is odorless and undetectable without specialized instruments.