

Getting office HVAC installation wrong costs more than money. Poorly sized equipment, skipped permits, and bad ductwork layouts create years of uneven temperatures, inflated energy bills, and frustrated employees. This office hvac installation guide walks you through every stage of a commercial HVAC project: from pre-installation planning and load calculations to step-by-step installation, troubleshooting common mistakes, and verifying system performance. Whether you’re outfitting a new build or replacing aging equipment in an existing office, the process demands the same systematic approach.
Table of Contents
- Key takeaways
- Office HVAC installation guide: preparation essentials
- Step-by-step installation process for office environments
- Troubleshooting common installation mistakes in offices
- Verification and optimization after installation
- My perspective on getting office HVAC right
- Ready to install your office HVAC the right way?
- FAQ
Key takeaways
| Point | Details |
|---|---|
| Load calculation comes first | Size your system against actual building load data, not square footage estimates, to avoid costly short cycling. |
| Permits protect your investment | Coordinate code compliance and building permits before installation starts to avoid legal and financial setbacks. |
| Zoning saves money and comfort | Split large offices into independent HVAC zones to maintain redundancy and reduce energy waste. |
| Verify before occupancy | Commission and test the system thoroughly before employees return to catch imbalances and calibration errors. |
| Monitor real usage data | Occupancy-based controls and usage monitoring can reduce energy consumption by 20 to 35 percent. |
Office HVAC installation guide: preparation essentials
Most installation failures trace back to what happened before a single piece of equipment was ordered. Thorough preparation separates a system that performs for 15 years from one that causes headaches in the first winter.
Load calculations and building assessment
Start with a Manual J or commercial equivalent load calculation. This accounts for square footage, ceiling height, window placement, occupancy density, and local climate. In Southwest Florida, the cooling load almost always dominates. Skipping this step and sizing by rule of thumb is how you end up with an oversized unit that short cycles and wastes energy, driving up humidity levels and utility costs simultaneously.
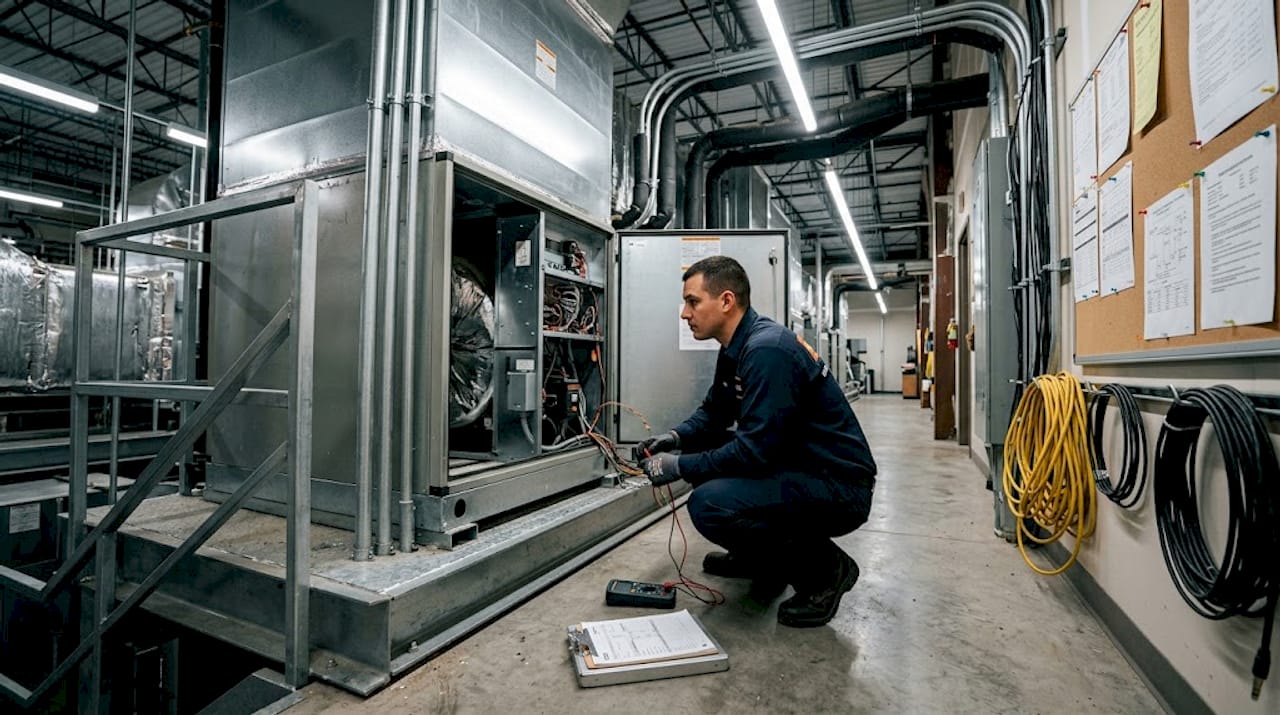
Review the building’s existing ductwork, electrical capacity, and mechanical room space. Many office retrofits reveal undersized electrical panels or structural limitations that push back timelines and inflate budgets.
Zoning and ventilation planning
For any office larger than 2,500 square feet, plan multiple independent HVAC zones from the start. Zoning by floor or functional area, such as server rooms, conference spaces, and open workstations, lets you condition only occupied areas and maintain service continuity if one zone fails. It also makes future expansion far simpler.
Ventilation planning should align with ASHRAE 62.1 standards for commercial occupancy. Calculate minimum outdoor air requirements based on your expected occupant count and activity level, not just the building’s rated capacity.
HVAC installation checklist before you break ground
- Confirm local building permits and mechanical permits are applied for
- Complete load calculations and equipment selection
- Verify electrical panel capacity and plan upgrades if needed
- Identify equipment placement: rooftop units, split systems, or VRF
- Map ductwork routing and identify penetration points
- Schedule coordination with electrical and structural contractors
- Confirm code compliance requirements with your local authority
| System type | Best for | Typical office size |
|---|---|---|
| Packaged rooftop unit | Single-floor or low-rise offices | 2,000 to 10,000 sq ft |
| VRF/VRV system | Multi-zone, multi-floor offices | 5,000 sq ft and above |
| Split system | Small offices or server rooms | Under 2,500 sq ft |
| Chilled water system | Large commercial buildings | 20,000 sq ft and above |
Pro Tip: Get your permit application submitted at least four to six weeks before your planned installation date. In many Florida counties, mechanical permit approvals run longer than contractors expect, and a delayed permit will stall your entire project.
Step-by-step installation process for office environments
Once preparation is complete and permits are in hand, the installation sequence matters as much as the equipment itself. Here is how a professional commercial HVAC installation should proceed.
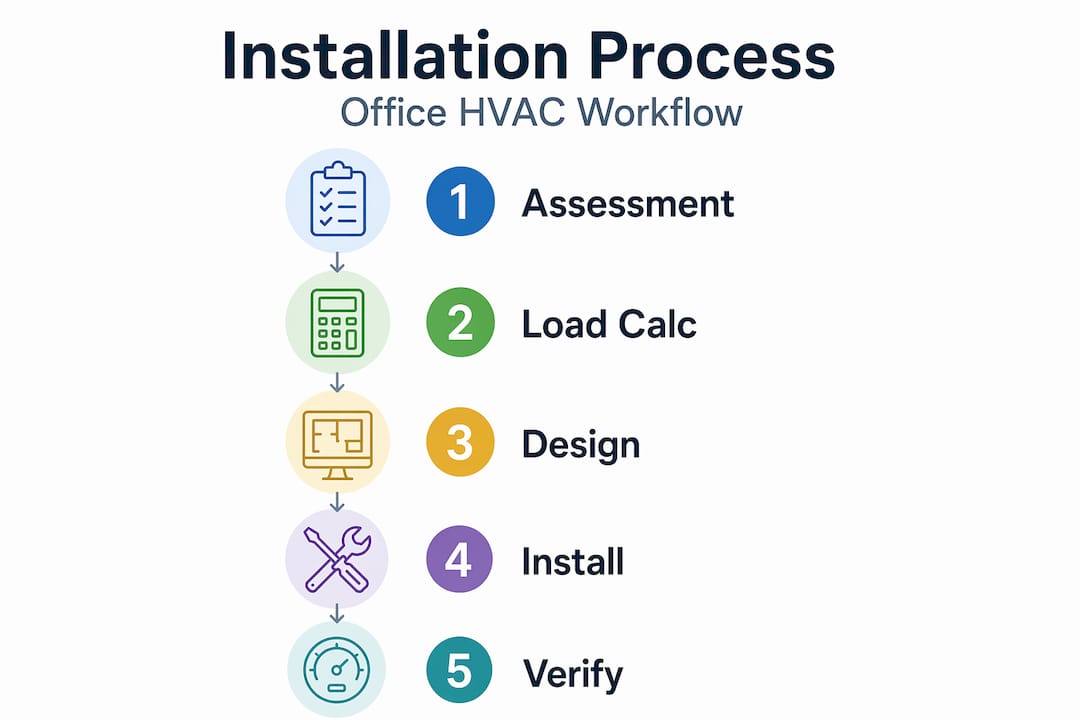
-
Site inspection and final verification. Walk the installation site with your mechanical contractor to confirm equipment dimensions, access routes, and structural load points. Verify that rooftop curbs, floor pads, or wall brackets are in place before equipment arrives.
-
Equipment placement and mounting. Position rooftop units over structural supports, not just roof decking. Indoor air handlers should be mounted for maximum service access, with at least 24 inches of clearance on all service sides. Secure all equipment to prevent vibration transmission into the building structure.
-
Ductwork fabrication and installation. Measure all duct runs carefully before fabricating. Incorrect duct measurements cause airflow restrictions that no amount of balancing can fully correct. Use mastic sealant or metal tape on all duct connections, not standard duct tape, which degrades within months. Size supply and return ducts to match the equipment’s airflow specifications, not the opening size in the wall or ceiling.
-
Refrigerant line installation. Run refrigerant lines with proper insulation and support. Minimize line length where possible, and follow manufacturer specifications for line set sizing. Pressure test before charging.
-
Electrical and control wiring. All wiring must meet NEC requirements and local codes. Install disconnect switches within sight of the equipment. Wire thermostats, sensors, and any building automation system (BAS) connections during this phase. Label every circuit clearly.
-
System startup and commissioning. Follow the manufacturer’s startup checklist exactly. Check refrigerant charge, measure supply and return temperatures, verify airflow at each register, and document baseline readings. Do not skip this step to meet a move-in deadline.
Rushing the startup phase is the single most common reason new commercial HVAC systems underperform from day one. The 90 minutes spent on proper commissioning prevents 90 hours of service calls later.
Pro Tip: Photograph every stage of the duct connections, electrical terminations, and refrigerant line routing before closing up ceilings and walls. You will want that documentation the first time a technician needs to troubleshoot without tearing apart finished space.
Troubleshooting common installation mistakes in offices
Even well-planned installations hit problems. Knowing which mistakes happen most often lets you catch them before they become expensive.
The biggest recurring issue is equipment oversizing. A contractor bids on a larger unit because it seems like a safer choice, but oversized HVAC equipment short-cycles constantly. Short cycling means the system never runs long enough to dehumidify properly, leaving the office feeling clammy even at the correct temperature. It also puts enormous wear on compressors and dramatically shortens equipment life.
Ductwork leakage is the second most common problem. Studies consistently show that leaky ducts in commercial buildings waste 20 to 30 percent of conditioned air before it reaches occupied spaces. Seal every connection during installation, and verify with a duct pressure test before finishing ceilings.
Here are other frequent mistakes that compromise system performance after installation:
- Inadequate return air paths, causing pressure imbalances and hot or cold spots across the floor plan
- Thermostats placed near heat sources, sunlit walls, or supply registers, producing false readings
- No occupancy-based controls, which means conditioning empty conference rooms and hallways all weekend
- Skipped airflow balancing, where some zones receive too much airflow and others receive too little
- Missing vibration isolation between rooftop units and the roof structure, which transmits noise into meeting rooms
| Mistake | Impact | Fix |
|---|---|---|
| Oversized equipment | Short cycling, poor humidity control | Recalculate load and resize |
| Duct leakage | 20 to 30% conditioned air loss | Mastic seal all joints, pressure test |
| Poor thermostat location | False readings, comfort complaints | Relocate to interior, occupant-level height |
| No airflow balancing | Uneven temperatures across zones | Commission with anemometer readings at each register |
| No occupancy controls | Energy waste on nights and weekends | Install programmable or smart controls |
For office HVAC best practices specific to Florida’s climate, the approach to humidity management carries more weight than in most other states.
Verification and optimization after installation
Installing the equipment correctly is only half the job. The system needs to be verified, calibrated, and optimized before it operates at the efficiency levels your load calculations projected.
Start with a full performance test. Measure supply air temperatures at every register and compare them to design specifications. Check static pressure across the air handler and at key duct branch points. Verify that each zone’s thermostat reads accurately against a calibrated reference thermometer.
Key steps in the verification phase include:
- Confirm refrigerant charge matches manufacturer specifications using superheat and subcooling measurements
- Calibrate all thermostats and sensors against a reference instrument
- Test every control sequence: occupied mode, unoccupied setback, and emergency shutdown
- Verify that smart thermostats and sensors are programmed with accurate occupancy schedules
- Document all baseline readings for future comparison
After the first 30 days of operation, pull any available runtime and energy data from your controls system or utility bills. Monitoring real usage data rather than relying on estimates can reduce energy waste by 20 to 35 percent. If you see runtime patterns that do not match your occupancy schedule, adjust setback times and sensor thresholds accordingly.
Schedule biannual professional inspections before the peak heating and cooling seasons. These visits cover filter replacement, coil cleaning, electrical connection checks, and airflow balancing. Skipping them is where systems that were installed correctly gradually drift into inefficiency.
For property managers looking at the broader picture of energy management, energy-efficient property strategies extend well beyond HVAC into lighting controls, access systems, and building automation that can all work together to cut operational costs.
My perspective on getting office HVAC right
I’ve spent years watching office HVAC projects go sideways, and the pattern almost never points to the equipment itself. What I’ve found, again and again, is that facility managers blame the hardware when the real culprit is how the system was set up to operate. The unit itself is fine. The operational logic around it is not.
The insight that most contractors won’t volunteer is this: facility managers often overestimate equipment issues when it’s the operational patterns driving the energy waste and comfort problems. I’ve seen offices replace perfectly functional five-year-old rooftop units because nobody had ever programmed the night setback correctly.
My strongest recommendation is to treat zoning as a safety net, not just an efficiency feature. If one zone fails on a hot July afternoon in Naples, the rest of your building stays operational. That matters enormously for business continuity. Splitting a 15,000 square foot office into three independent zones costs more upfront, but it eliminates the scenario where a single compressor failure sends everyone home.
What I’ve learned is that the best-performing office HVAC systems I’ve seen share one trait: someone is actually looking at the data. Not waiting for complaints. Not reacting to breakdowns. Actively monitoring runtime, energy consumption, and temperature logs and making small adjustments before small problems become expensive ones.
— albert
Ready to install your office HVAC the right way?
If this guide confirmed that your planned installation is more complex than you first expected, you’re not alone. Most commercial HVAC projects benefit from professional expertise at the planning stage, not just the installation stage.
Ultraairswfl works with facility managers and business owners across Naples, Cape Coral, and Fort Myers to plan, install, and maintain commercial HVAC systems that perform from day one. From load calculations and zoning design to full commercial heating solutions and indoor air quality improvements, the team handles every stage of the process. Protect your investment with a commercial maintenance contract that keeps the system verified, balanced, and running at peak efficiency year-round. Contact Ultraairswfl to schedule a commercial site assessment.
FAQ
What size HVAC system does an office need?
Office HVAC sizing requires a formal load calculation that accounts for square footage, ceiling height, occupancy density, window area, and local climate. Using rough square footage estimates alone frequently produces oversized equipment that short cycles and wastes energy.
How long does office HVAC installation take?
Most commercial HVAC installations for offices between 2,000 and 10,000 square feet take three to seven business days, depending on ductwork complexity and equipment type. Larger multi-zone systems can take two to four weeks.
What permits are required for commercial HVAC installation?
Most jurisdictions require a mechanical permit, and many also require electrical permits for the associated wiring. Permit and code coordination should begin four to six weeks before the planned installation start date.
How often should office HVAC systems be serviced?
Commercial HVAC systems need professional inspections at least twice per year, ideally scheduled before peak cooling and heating seasons. Each visit should include filter replacement, coil cleaning, and electrical connection verification.
What is the typical HVAC installation cost for an office?
HVAC installation cost in offices varies widely based on system type, building size, and ductwork complexity. Small split system installations may start around $5,000 to $10,000, while full VRF systems for larger offices can exceed $50,000 to $150,000 or more depending on scope and equipment selection.
Recommended
- Commercial HVAC best practices for Southwest Florida buildings
- HVAC Installation for Custom Home Builders in Naples: The 2026 Engineering Guide
- Upgrade Your HVAC System: Step-by-Step Guide for Better Efficiency
- HVAC Installation in Fort Myers: The Complete 2026 Homeowner’s Guide – Ultra Air Heating and Cooling