
Annual professional tune-ups combined with monthly filter checks are the single most effective strategy for heating unit maintenance. Book a qualified HVAC technician every fall before your system runs hard, and handle a few quick tasks yourself each month. That combination keeps your system safe, preserves your warranty, and cuts the odds of a mid-winter breakdown to near zero.
Supporting facts worth knowing upfront:
- ENERGY STAR recommends scheduling seasonal check-ups around the fall time change, before heavy heating use begins.
- Dirt and neglect are among the leading causes of heating-system failure; a clogged filter alone forces the blower to work harder and shortens equipment life.
- Most manufacturer warranties require documented professional service to remain valid.
Quick actions you can do in the next 15 minutes:
- Check your air filter right now. If it looks gray and dense, replace it.
- Walk your vents and registers. Make sure none are blocked by furniture or rugs.
- Test your thermostat by bumping the heat setting up 5°F and confirming the system responds.
- Verify your carbon monoxide detector has fresh batteries.
Key Takeaways
Annual fall tune-ups combined with monthly filter checks are the most effective way to keep a heating system safe, efficient, and under warranty.
| Point | Details |
|---|---|
| Annual pro tune-up timing | Schedule a professional heating service every fall, 4–6 weeks before your first cold snap. |
| Monthly filter checks | Inspect and replace air filters every 30–90 days; dirty filters are a leading cause of system failure. |
| Safety red flags | Shut down immediately for gas smells, CO alarms, or visible heat-exchanger cracks — call emergency services. |
| Keep service records | Log every professional visit with findings and parts replaced to protect manufacturer warranties. |
| Ultraairswfl | Certified technicians in Naples, Cape Coral, and Fort Myers handle full tune-ups, safety inspections, and warranty documentation. |
Table of Contents
- What your heating unit maintenance checklist should cover
- What a professional heating tune-up actually includes
- When to schedule service and how often
- What a heating tune-up typically costs
- Safety checks and red flags you should never ignore
- How to handle the DIY tasks safely
- Why a qualified HVAC technician is worth every dollar
- What I prioritize when preparing a heating system for winter
- Ultraairswfl handles the maintenance work you should not do yourself
- Sources
What your heating unit maintenance checklist should cover
Good home heating care comes down to three cadences: what you do monthly, what you do before the heating season, and what gets handled once a year. Most homeowners collapse all three into one vague “call someone in the fall” plan. Separating them out makes the whole process faster and more reliable.
Monthly tasks (10–15 minutes)
- Air filter: Inspect every 30 days; replace when visibly dirty or every 60–90 days at minimum. Homes with pets or allergy sufferers often need monthly replacement.
- Thermostat check: Confirm the display is accurate and the system responds within a few minutes of a setting change.
- Visual inspection: Glance at the unit for unusual condensation, rust streaks, or debris accumulation around the base.
- Vents and registers: Walk the house and confirm all supply and return vents are open and unobstructed.
Seasonal checklist (September–October, before first cold snap)
CenterPoint Energy’s furnace maintenance guidance and the Hummert heater-unit checklist both flag these as the highest-priority pre-season steps:
- Clear a 2-foot clearance around the outdoor unit or heat pump; remove leaves, mulch, and debris.
- Inspect vent pipes and flue openings for bird nests, wasp nests, or rodent material. Pests commonly nest in idle units during summer months.
- Test the pilot light or electronic ignition. A pilot that won’t stay lit or an ignition that clicks repeatedly without firing needs a technician before the season starts.
- Check the condensate drain line for algae or blockage.
- Replace the air filter fresh at the start of the heating season, regardless of when you last changed it.
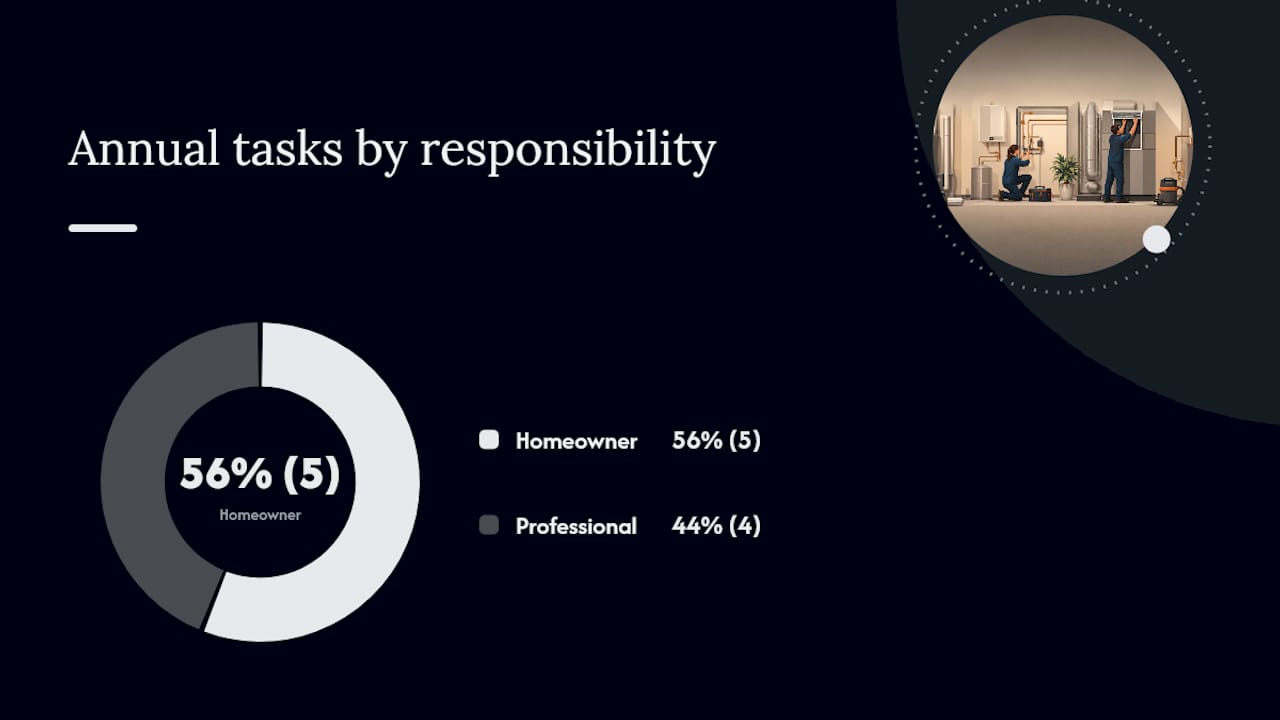
Annual tasks: homeowner vs. pro split
| Task | Who Does It | Estimated Time |
|---|---|---|
| Air filter replacement | Homeowner | 5–10 min |
| Vent and register cleaning | Homeowner | 20–30 min |
| Thermostat battery/calibration check | Homeowner | 5 min |
| Outdoor unit clearance | Homeowner | 15–20 min |
| Condensate drain flush | Homeowner | 10 min |
| Burner inspection and combustion test | Pro only | Part of tune-up |
| Heat exchanger inspection | Pro only | Part of tune-up |
| Electrical connection tightening | Pro only | Part of tune-up |
| Refrigerant level check (heat pumps) | Pro only | Part of tune-up |
What a professional heating tune-up actually includes
A qualified technician does far more than swap a filter and glance at the thermostat. The ENERGY STAR professional maintenance checklist outlines component-level checks that require calibrated instruments and professional training. Here is what you should expect from a thorough visit:
- Thermostat calibration: Verifies the thermostat reads and responds accurately; a unit running 3°F off wastes energy on every cycle.
- Electrical connections: Tightening loose terminals and measuring voltage and current draw on motors; loose connections cause premature motor failure.
- Lubrication: Moving parts in the blower motor and fan assembly need lubrication to reduce friction and amperage draw.
- Condensate drain inspection: Algae buildup in the drain pan causes water damage and mold; a tech flushes and treats the line.
- Burner inspection: Checks for proper flame color, shape, and combustion efficiency on gas units.
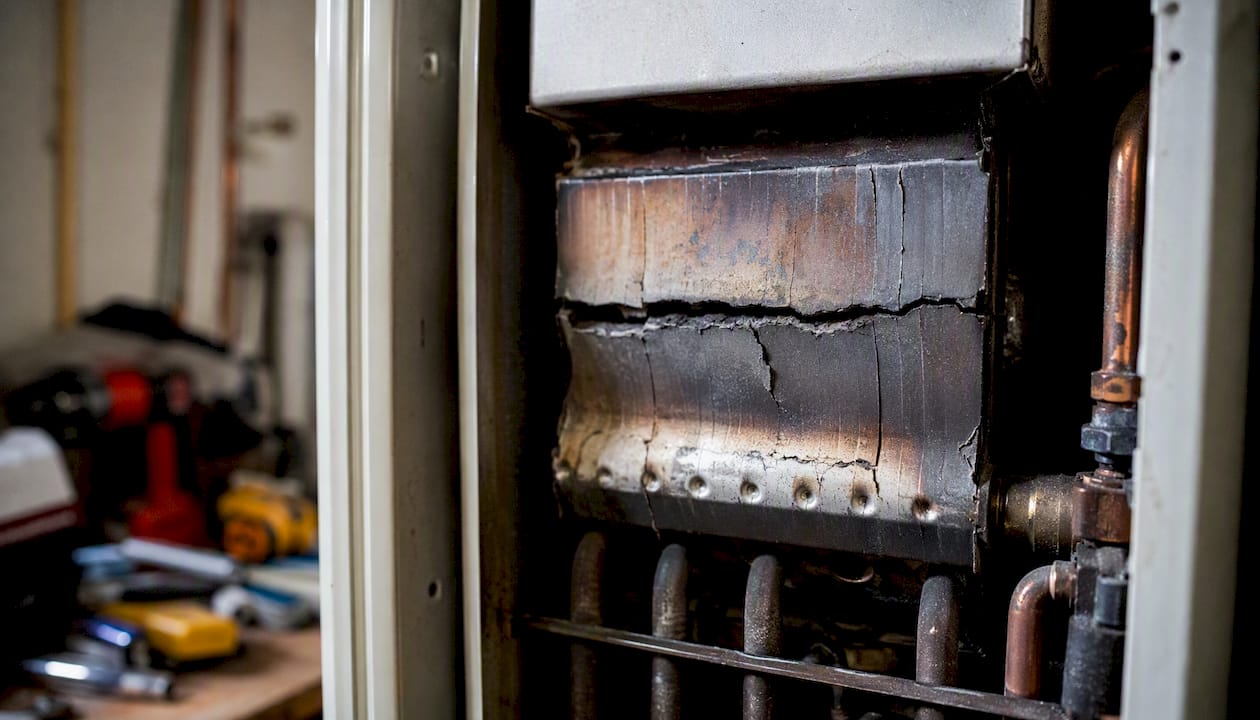
- Heat exchanger inspection: A cracked heat exchanger is a carbon monoxide hazard. Technicians use mirrors, cameras, or combustion analyzers to check for cracks invisible to the naked eye.
- Combustion analysis: A flue-gas analyzer measures CO, CO₂, and efficiency percentages. This test cannot be replicated with consumer tools.
- Fuel and gas connection check: Pressure testing and visual inspection of gas lines and valves per the Hummert maintenance checklist.
- Vent and flue inspection: Confirms exhaust gases are venting safely to the exterior.
| Technician Check | What It Reveals | Expect an Upcharge? |
|---|---|---|
| Combustion analysis | Efficiency loss, CO risk | No (standard) |
| Heat exchanger inspection | Cracks, CO hazard | No (standard) |
| Motor amperage test | Failing motor, overload | Only if repair needed |
| Refrigerant level (heat pumps) | Leak, undercharge | Yes, if recharge needed |
| Condensate drain flush | Blockage, mold risk | No (standard) |
| Gas pressure test | Unsafe pressure, leak | Only if repair needed |
A cracked heat exchanger has no safe threshold. Even a hairline fracture allows combustion gases, including carbon monoxide, to mix with circulated air. If a technician flags a cracked heat exchanger, the system should not run until it is repaired or replaced. This is not a “monitor it” situation.
Why keep service records? PNNL’s O&M best-practices guidance recommends maintaining written or electronic logs of every service visit, including findings and corrective actions. Those records support warranty claims, help technicians spot recurring issues faster, and document compliance with manufacturer service requirements per Bryant’s furnace maintenance guidance.
When to schedule service and how often
Schedule a professional heating tune-up at least once per year. The right time is fall, specifically September or October in most U.S. climates, before overnight temperatures drop and demand spikes. ENERGY STAR’s scheduling guidance ties this directly to the fall time change as a practical reminder.
Here is a scheduling framework that works for most homeowners and property managers:
- Book 4–6 weeks before your first expected cold snap. HVAC technicians fill up fast in October and November. A late-September booking gives you flexibility if the first appointment needs rescheduling.
- Dual-fuel or heat-pump systems need two checks. If your system switches between gas and electric heat, schedule a heating check in fall and a cooling check in spring. Each mode has distinct components that need separate attention.
- Multi-property managers: stagger your dates. Booking all properties in the same week creates scheduling conflicts and limits your ability to compare technician notes across units. Spread bookings across a two-to-three-week window.
- New construction or recently installed systems still need annual service. Manufacturer warranties on brands like Trane typically require documented annual professional maintenance to stay valid, even on brand-new equipment.
- After any extended idle period, schedule a check before restart. A system that sat unused for a full season needs a pre-startup inspection, not just a filter swap.
Pro Tip: Set a recurring calendar reminder for September 1st each year labeled “Book HVAC tune-up.” Pair it with the fall time-change reminder ENERGY STAR suggests, and you will never miss the window again.
What a heating tune-up typically costs
Routine professional maintenance for a residential heating system generally runs in the range of $80–$150 for a standard tune-up visit, though prices vary by region, system type, and what the technician finds. HVACBase’s furnace maintenance guide notes that regular maintenance measurably improves energy efficiency and extends equipment life, which translates to avoided repair costs over time.
Factors that push the price higher:
- System age: Older units often need more time to inspect and may have worn parts that require replacement during the visit.
- Gas vs. electric: Gas furnace tune-ups typically cost slightly more than electric because combustion analysis and gas-line checks add time.
- Accessibility: A unit in a tight crawl space or rooftop installation takes longer to service.
- Repairs discovered during the visit: A technician who finds a failing capacitor, a cracked inducer, or a clogged heat exchanger will quote a separate repair. That is not a bait-and-switch; it is the point of preventive maintenance.
- Filter and parts: Some contractors include a filter in the tune-up price; others charge separately. Ask upfront.
The math on skipping maintenance: A neglected system that fails mid-January typically costs $300–$1,000+ for an emergency repair call, plus the premium for after-hours service. A $100 fall tune-up that catches a $40 capacitor before it fails is not an expense; it is a hedge.
Maintenance plans, which bundle annual tune-ups with priority scheduling and discounted parts, often reduce per-visit costs further. See the maintenance plan breakdown for Florida homeowners for a detailed cost comparison.
Safety checks and red flags you should never ignore
Some heating system problems are inconvenient. Others are emergencies. Knowing which is which can prevent a house fire, a CO poisoning, or a gas explosion.
Shut down immediately and call emergency services (gas company or 911) if you notice:
- A sulfur or rotten-egg smell near the unit or gas lines (gas leak)
- A CO alarm sounding anywhere in the home
- Visible flames outside the burner compartment
- A persistent burning smell that does not clear within a few minutes of startup
Urgent but not immediately life-threatening (call a technician within 24–48 hours):
- Short-cycling: the system turns on and off every few minutes without reaching the set temperature
- Consistent uneven heating across rooms that was not there last season
- Loud banging, screeching, or grinding from the unit
- Yellow or orange burner flame instead of blue (indicates incomplete combustion)
If you smell gas: Do not flip any light switches, use your phone inside the home, or attempt to locate the leak yourself. Leave the building immediately, leave the door open, and call your gas utility from outside. Re-enter only after the utility has cleared the line.
Pro Tip: Place carbon monoxide detectors on every level of your home, including inside or directly outside each sleeping area. Test them monthly when you check your air filter, and replace the units every 5–7 years regardless of battery status. The EPA’s indoor air quality resources provide additional guidance on CO detector placement and ventilation standards.
How to handle the DIY tasks safely
These are the maintenance steps a homeowner can perform without professional training. Stop at any point where you smell gas, see sparks, or find wiring damage, and call a technician.
Before you start: Turn the thermostat to “off.” For furnaces, locate the power switch on the unit (it looks like a standard light switch) and turn it off. Do not proceed with any internal inspection on a gas unit without confirming the gas valve is closed.
-
Change the air filter. Note the arrow on the filter frame; it points in the direction of airflow, toward the blower. Slide the old filter out, note the size printed on the frame, and slide the new one in with the arrow pointing the same direction. Dispose of the old filter in a sealed bag. Per CenterPoint Energy’s furnace tips, this single task has more impact on system performance than almost anything else a homeowner can do.
-
Clean registers and accessible vents. Remove register covers (usually two screws), wash them with warm soapy water, and dry completely before reinstalling. Use a vacuum with a brush attachment to clear dust from the first 6–8 inches of the duct opening. Do not reach further or use a leaf blower; you risk pushing debris deeper into the duct.
-
Clear the outdoor unit or heat pump. Power the unit off at the disconnect box first. Remove leaves, grass clippings, and debris from the top and sides. Trim any vegetation to maintain at least 2 feet of clearance on all sides. Do not hose down the interior coils without knowing your unit’s specifications; some manufacturers advise against it.
-
Inspect the condensate drain line. Locate the PVC drain line exiting the air handler. Pour a cup of diluted white vinegar (50/50 with water) into the drain pan access port to inhibit algae growth. If water is standing in the pan, the line is already blocked and needs a wet-vac or professional flush.
-
Check for pest nesting. Before the heating season, visually inspect around the unit base, inside the cabinet (with power off), and along any accessible duct runs for rodent droppings, chewed insulation, or nesting material. The Hummert checklist specifically flags this as a critical pre-season step. If you find evidence of nesting near wiring, call a technician before running the system.
-
Test the thermostat. With the system powered back on, set the thermostat 5°F above room temperature and time how long it takes for warm air to reach the vents. More than 3–5 minutes suggests a calibration issue or a delayed ignition worth mentioning to your technician.
-
Inspect the flue pipe visually. Look at the visible sections of the exhaust flue for rust, separation at joints, or holes. Any gap in a flue pipe is a CO hazard. Do not attempt to seal it yourself; call a technician.
Common mistakes to avoid:
- Installing the filter backwards (restricts airflow immediately)
- Closing more than 20% of supply vents to “redirect” heat (creates pressure imbalance)
- Ignoring a tripped high-limit switch by simply resetting it without finding the cause
Pro Tip: Pair your filter change with a quick home weatherization check of exterior doors and windows. A well-sealed home reduces the load on your heating system, which means fewer run cycles and a longer equipment life.
Why a qualified HVAC technician is worth every dollar
The honest reason to hire a pro is not just convenience. It is access to tests and tools that genuinely cannot be replicated at home.
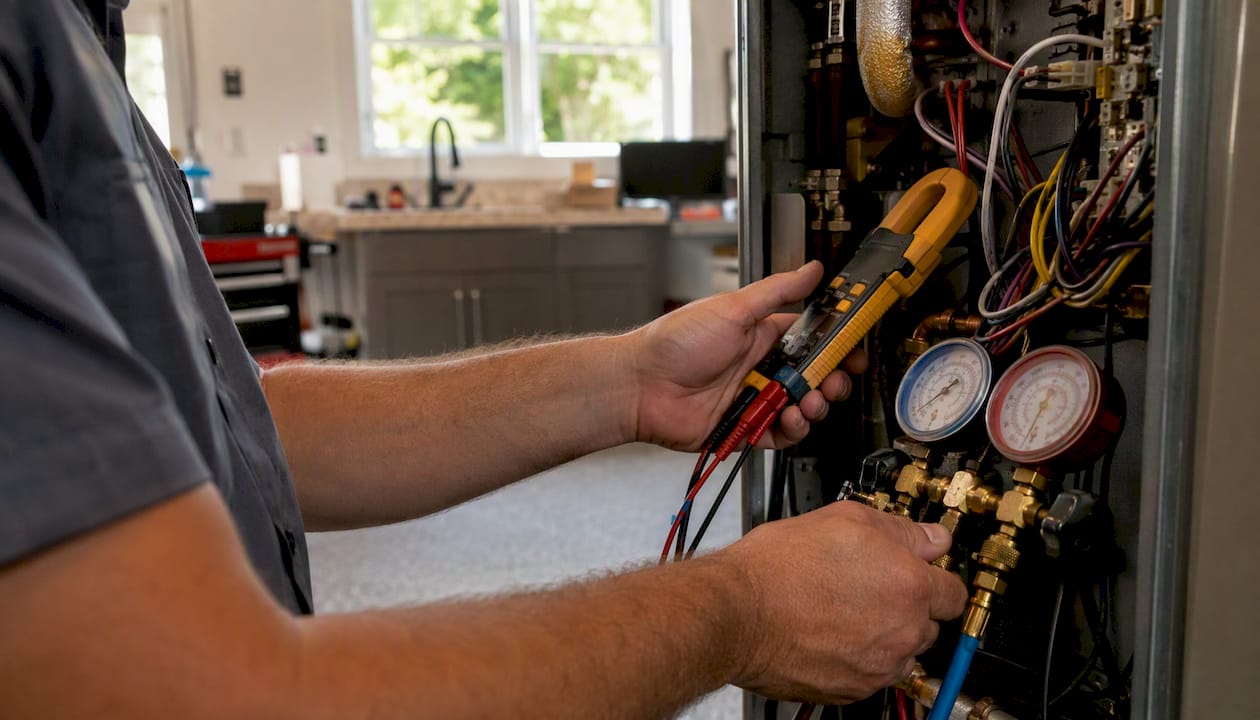
A combustion analyzer measures flue-gas composition in real time, flagging carbon monoxide output, excess air, and combustion efficiency as a percentage. A heat-exchanger crack detection procedure uses pressure differentials, cameras, or dye tests to find fractures invisible to the eye. Refrigerant leak detection on heat pumps requires an electronic leak detector and EPA Section 608 certification to handle refrigerants legally. Motor amperage and vibration analysis predicts bearing failure weeks before the motor actually quits.
None of those tests have a consumer equivalent.
Documented professional service is your warranty’s proof of life. Most manufacturers, including Trane, require annual professional maintenance as a condition of the equipment warranty. A technician’s signed service report is the evidence you need if a component fails under warranty and the manufacturer asks for service history. Without it, a $1,200 heat exchanger replacement may not be covered.
PNNL’s O&M best practices recommend keeping a written or electronic log of every service visit, including findings, parts replaced, and technician notes. For property managers running multiple units, a simple spreadsheet with unit ID, service date, technician name, and findings is enough to satisfy most warranty requirements and spot recurring issues across properties.
Pro Tip: After every professional visit, ask the technician for a written service report listing every item checked, every measurement taken, and any recommendations. A technician who resists providing this in writing is worth questioning. File the report with your warranty documentation.
The HVAC tune-up checklist from Ultraairswfl outlines exactly what a thorough visit should cover, so you can compare it against any technician’s report.
What I prioritize when preparing a heating system for winter
Most maintenance guides treat every checklist item as equally urgent. In practice, that is not how it works. Safety comes first, always. A cracked heat exchanger or a gas-line issue is not a “schedule it when convenient” item; it is a “do not run this system” item. Everything else, airflow optimization, filter schedules, thermostat calibration, matters, but it matters on a different timeline.
The second thing I would tell any homeowner or property manager: your service records are worth more than you think. Not just for warranty claims, but for pattern recognition. A system that needed a new capacitor two years in a row is telling you something about the compressor. A technician who sees that history can give you a real answer about whether to repair or replace, rather than a guess.
The practical advice in this article reflects the same priorities: handle the safety checks first, keep the airflow clean, and document everything a professional touches.
Ultraairswfl handles the maintenance work you should not do yourself
Skipping the annual tune-up is the most expensive maintenance decision most homeowners make. Ultraairswfl’s certified technicians serve Naples, Cape Coral, and Fort Myers with comprehensive heating solutions that cover every item on the professional checklist: combustion analysis, heat-exchanger inspection, electrical testing, and full system documentation for warranty compliance.
Maintenance plan members get priority scheduling before the fall rush, discounted parts, and a documented service record after every visit. For property managers running multiple units, that record-keeping alone saves hours of warranty paperwork. Whether you need a one-time fall tune-up, an emergency repair, or an indoor air quality assessment alongside your heating service, Ultraairswfl covers it in a single visit. Book your fall tune-up now before the October schedule fills.
Sources
These are the authoritative resources referenced throughout this article. Each one is worth bookmarking for ongoing reference.
- ENERGY STAR – Maintenance Checklist
- PNNL – Unitary HVAC equipment | O&M best practices
- HVAC Base – Complete Furnace Maintenance Guide: 15 Essential Tasks for Peak Performance
- Hummert – Checklist for keeping the heat on (heater unit maintenance checklist)
- CenterPoint Energy – Furnace maintenance tips
- EPA – U.S. Environmental Protection Agency
Keep your manufacturer’s documentation alongside these resources. Model-specific maintenance intervals and warranty requirements vary, and the manufacturer’s own guide takes precedence over general checklists for your specific unit.